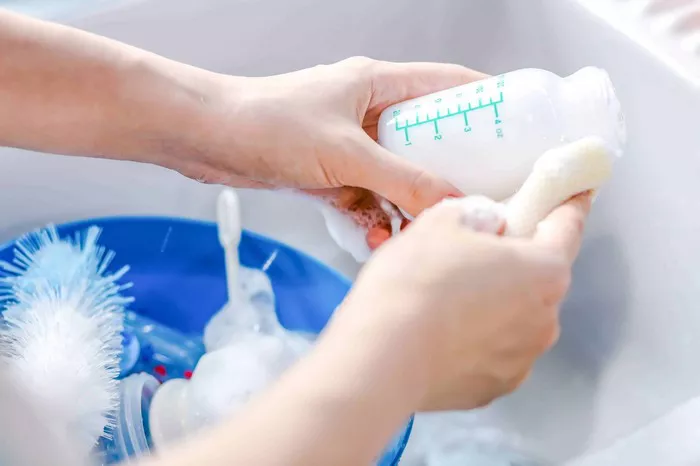
In the whirlwind of caring for a newborn, one task stands out as both vital and repetitive: washing baby bottles. For parents, ensuring that these feeding vessels are impeccably clean isn’t just about maintaining a tidy kitchen; it’s a matter of safeguarding their little one’s health. In this guide, we’ll delve into the importance of proper cleaning, outline the basic steps for washing baby bottles, discuss sterilization methods, and provide storage tips to ensure your baby’s bottles remain pristine and safe for use.
Importance of Proper Cleaning
Babies are fragile beings, especially when it comes to their immune systems. Unlike adults, whose immune systems have had time to mature and develop defenses against harmful bacteria, babies are still building their immunity. Consequently, they are more susceptible to illnesses caused by bacteria lurking in dirty bottles.
Imagine the scenario: a baby’s bottle, left unwashed after a feeding session, becomes a breeding ground for bacteria. The remnants of milk left to fester in the crevices of the bottle provide an ideal environment for bacteria to thrive. When the bottle is reused without thorough cleaning, these bacteria can contaminate the fresh milk or formula, potentially causing gastrointestinal issues or even more serious infections in the infant.
Proper cleaning of baby bottles is not merely a matter of hygiene; it’s a crucial aspect of infant care. By maintaining meticulous cleanliness, parents can help safeguard their baby’s health and well-being.
Basic Steps for Washing Baby Bottles
1. Rinse Immediately: After each feeding session, the first step is to rinse the bottle immediately. This helps prevent the buildup of milk residue or dirt, making the subsequent cleaning process more manageable.
2. Gather Materials: Before diving into the washing process, ensure you have all the necessary materials on hand. This includes a bottle brush specifically designed for cleaning baby bottles, a nipple brush for the rubber nipple, and a baby-safe dishwashing liquid.
3. Prepare Soapy Water: Rinse the sink thoroughly and fill it with hot, soapy water. The temperature of the water should be comfortably hot but not scalding.
4. Disassemble and Wash: Take apart the bottle, removing the ring and nipple. Washing each part separately ensures that every nook and cranny is thoroughly cleaned, eliminating any traces of old milk residue.
5. Dishwasher Option: If the baby bottles are dishwasher-safe, they can be washed in the dishwasher. However, handwashing is often preferred for a more thorough clean, especially for bottles with narrow necks or intricate parts.
Handwashing Method
1. Wash Hands: Begin by washing your hands thoroughly with soap and water. Clean hands are essential to prevent any transfer of bacteria to the baby bottles during the washing process.
2. Rinse Bottle Parts: Hold each bottle part under running water to remove any visible traces of milk or formula.
3. Scrub and Clean: Use a bottle brush to scrub the interior of the bottle, paying particular attention to the bottom and sides where residue tends to accumulate. For the plastic nipples and rings, use a nipple brush to ensure thorough cleaning.
4. Air-Dry: After washing, allow all the cleaned items to air-dry completely before reassembling the bottle. Avoid using dish towels to pat items dry, as they may harbor germs and transfer them back onto the bottles.
Sterilization (Optional)
While sterilization is not always necessary, it can provide an extra layer of cleanliness, especially for newborns or infants with compromised immune systems. There are several methods for sterilizing baby bottles:
1. Boiling: Place the disassembled bottle parts in a pot of boiling water for approximately five minutes. Ensure that all parts are fully submerged. Remove them carefully using sanitized tongs and allow them to air-dry.
2. Steam Sterilizers: Electric steam sterilizers offer a convenient and efficient way to sterilize baby bottles. Simply place the disassembled bottle parts in the sterilizer, add water as per the manufacturer’s instructions, and run the sterilization cycle.
3. Microwave Sterilization: Microwave sterilization bags or microwave-safe sterilization containers provide a quick and easy way to sterilize baby bottles. Follow the instructions provided with the sterilization product for proper usage.
It’s important to note that sterilization should be done periodically, rather than after every use, as excessive sterilization can cause wear and tear on the bottle parts.
Storage Tips
Once the baby bottles are clean and dry, proper storage is essential to maintain their cleanliness:
1. Use a Clean Drying Rack: Store cleaned and dry bottles on a clean drying rack specifically designated for baby items. Avoid placing them directly on countertops or dish towels, as these surfaces may harbor germs.
2. Avoid Using Dish Towels: As mentioned earlier, dish towels can harbor bacteria and transfer them to the baby bottles. Instead, opt for air-drying or use a designated bottle drying rack.
3. Store in a Clean Environment: Ensure that the area where the baby bottles are stored is clean and free from dust or other contaminants. Consider covering the bottles with a clean cloth or lid to protect them from airborne particles.
By following these comprehensive guidelines for washing baby bottles, parents can rest assured that they are providing their little ones with clean and safe feeding equipment. Remember, proper hygiene practices not only protect the baby’s health but also provide peace of mind for parents.


